Aetiket Label Printer - Default Font
|
|
Caution!: FileMaker Pro saves all changes as they are made to files. Be sure to make a backup copy of Aetiket.fp3 before changing the default font or print layouts. You are permitted to change the Print and Input layouts as described below. These layouts are clearly marked "Print" and "Input". Changing other layouts may cause Aetiket Label Printer to fail, and unauthorized changes will invalidate your license. If you would like to see a feature or Label sheet implemented, please feel free to write me, as I would like to pass on the benefits to all of my users. |
The below discussion only applies to users who have registered Aetiket Label Printer. If you have not done so already, you may register directly online. After I receive your registration, I will send you a registration code which will enable you to edit the default font and print layouts.
This is really easy...
Changing the default font for a field is not at all difficult. You simply go to Layout mode, select the field, and then change its font setting. ... voilà, you're done. For those of us who have never been under the hood of a FileMaker Pro database, the following step-by-step is meant to give you the important clues as to how to make it work without a hitch.
Editing the default font and print layouts requires some knowledge of FileMaker Pro layouts. This is not difficult, but if you are not familiar with editing a layout, I draw your attention to and encourage you to read the FileMaker Pro User's Guide:
"Chapter 3: Laying out and arranging information."
|
Layout Mode To edit the default font, you must first go to the Setup page for the label type. Do this simply by clicking the Input button in Aetiket Label Printer. |
|
|
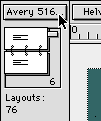
Once you are in your chosen Setup page, enter Layout mode by selecting Layout from the Mode pop-up menu at the bottom of the screen. If the status area and layout pop-up menu are not visible (as shown on the right), click on the Status area control button at the bottom of the screen. |
|
 |
 |
|
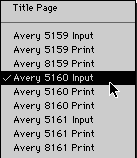
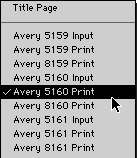
Input & Print Layouts There are two layouts that must be accessed to change the default font: the input and print layouts. Each label type has at least one corresponding input layout and print layout. If both laser and ink jet versions of a label type are available, there may be more than one print layout for each input layout. The illustration on the right shows the Layout pop-up menu with some typical layouts. For example, for the input layout "Avery 5160 Input" there are two corresponding print layouts: Avery 5160 Print and Avery 8160 Print. You should change the font or paragraph formatting in each of the related layouts to achieve consistent results. |
 |
|
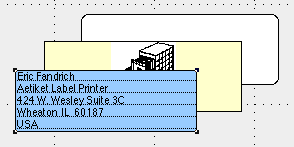
Default Fields & Objects There are three main objects that are used in layouts with Aetiket Label Printer. The Avery 5160 objects are shown in the illustration below as they appear in the "Avery 5160 Input" layout. The fields are displayed with a sample text or graphic to aid in formatting. |
|
 |
|
|
These three objects are arranged in the following order, from top to bottom: Label (a text field) These are shown in blue, yellow, and white in the illustration below. |
|
 |
|
|
The Label Placement Graphic is only used as a guide, usually isn't printed, and is locked in place to the layout. The Label and Label Graphic fields can be moved, formatted, and changed in size. The Label field is the only object that needs to be selected in order to change the default text. Current Default Font The current default font type and size can be seen in the top left corner of the layout window. The Label field can be selected simply by clicking on it. |
|
 |
|
|
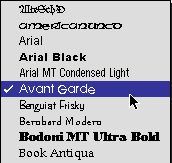
The default for Avery 5160 in this case happens to be Helvetica, 10 point. To change the font, you must first select the Label field (by clicking on it), and then select the new font or style from the text edit bar. Here "Avant Garde" is chosen. |
 |
|
Here, the changed font can be seen in the sample text. The result for the input page must also be duplicated for the print pages. |
|
 |
|
|
Print Layout To change the print layout settings, go to the Layout pop-up menu, and then choose the appropriate print layout from the list. |
 |
|
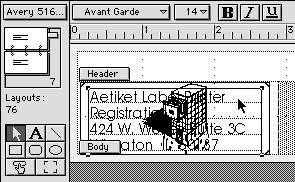
In the print layout, select the Label field, and then set the default font and size as in the input layout. A view of the print layout for Avery 5160 can be seen below, and the Label field has already been changed to the new Avant Garde font setting. |
|
|
|
|
Having changed the default text for the input and print layouts, you must return to Browse mode. This can be simply achieved by selecting Browse from the Mode pop-up menu at the bottom of the Aetiket Label Printer window. |
 |
|
Now that you have successfully changed the text field to Avant Garde, you may find yourself changing it back to Helvetica each time you print a label! |
|
Page last updated August 10, 1998
Copyright © 1997-1999 by Eric Fandrich All Rights Reserved.
